Signs Your Toilet Cistern or Flush Plate Needs Replacing
Most cistern faults start quietly — a faint hiss between flushes, a flush that suddenly needs a second go — and get ignored until the water bill climbs or a wall starts to feel damp. Spotting the warning signs early tells you whether you're facing a quick part swap or a full toilet cistern replacement. (The cistern is the water tank that feeds the bowl; if you're in the US, you'll know it as the toilet tank.) It matters even more with a concealed cistern — the wall-hung setups common across the UK, Europe, and increasingly the US, where the tank is hidden behind the wall or inside a furniture unit — because you can't simply lift a lid to look inside. Here's what to watch and listen for, whether you have a traditional close-coupled toilet or a concealed one.
Constantly running water. If you can hear water trickling into the bowl long after the flush has finished, the seal at the bottom of the cistern has stopped sealing — that's the flush valve washer, or the flapper on US-style tanks. It's the single biggest source of wasted water in the average home: a slow leak can quietly run through hundreds of litres (dozens of gallons) a day. Sometimes it's cured by swapping the washer or flapper; if the valve body itself is worn or furred up with mineral deposits, the whole mechanism needs replacing.
Weak or incomplete flush. When one flush no longer clears the bowl, the usual culprits are a low water level in the cistern, a valve that's closing too early, or mineral deposits (limescale) blocking the small rim jets under the bowl. Rule out the cheap fixes first — make sure the shut-off valve (isolation valve, in UK terms) is fully open and the water fills to the marked line — but a flush that stays weak after those checks usually points to a tired flush mechanism.
Water leaking silently into the bowl. Not every leak makes a sound. To confirm one, put a few drops of food dye into the cistern, wait 20–30 minutes without flushing, then check the bowl. If color bleeds through, water is escaping past the flush valve seal and the part needs replacing. It's worth testing on any older toilet, because a silent leak still shows up on your bill even when nothing looks wrong.
A leaking cistern on the outside. Water pooling around the base of the toilet, damp patches, peeling paint, or a musty smell all point to a leaking toilet cistern — usually a failed tank-to-bowl gasket, a perished bolt washer, or a cracked body. With a concealed unit you often won't see the water at all; instead you'll notice damp or discolored walls, soft skirting boards or baseboards, warped flooring, or a water bill that's crept up for no obvious reason. Catching this early is the difference between replacing a seal and repairing water-damaged studwork behind the wall.
A cracked cistern. A visible hairline crack in a ceramic cistern or tank is effectively terminal — cracks spread under water pressure and rarely hold a lasting repair, so a cracked body means replacing the cistern rather than patching it. The better news for concealed systems is that the hidden tank is usually plastic and the working parts are designed to be swapped individually, so concealed cistern repair is often possible without tearing out tiles or panels.
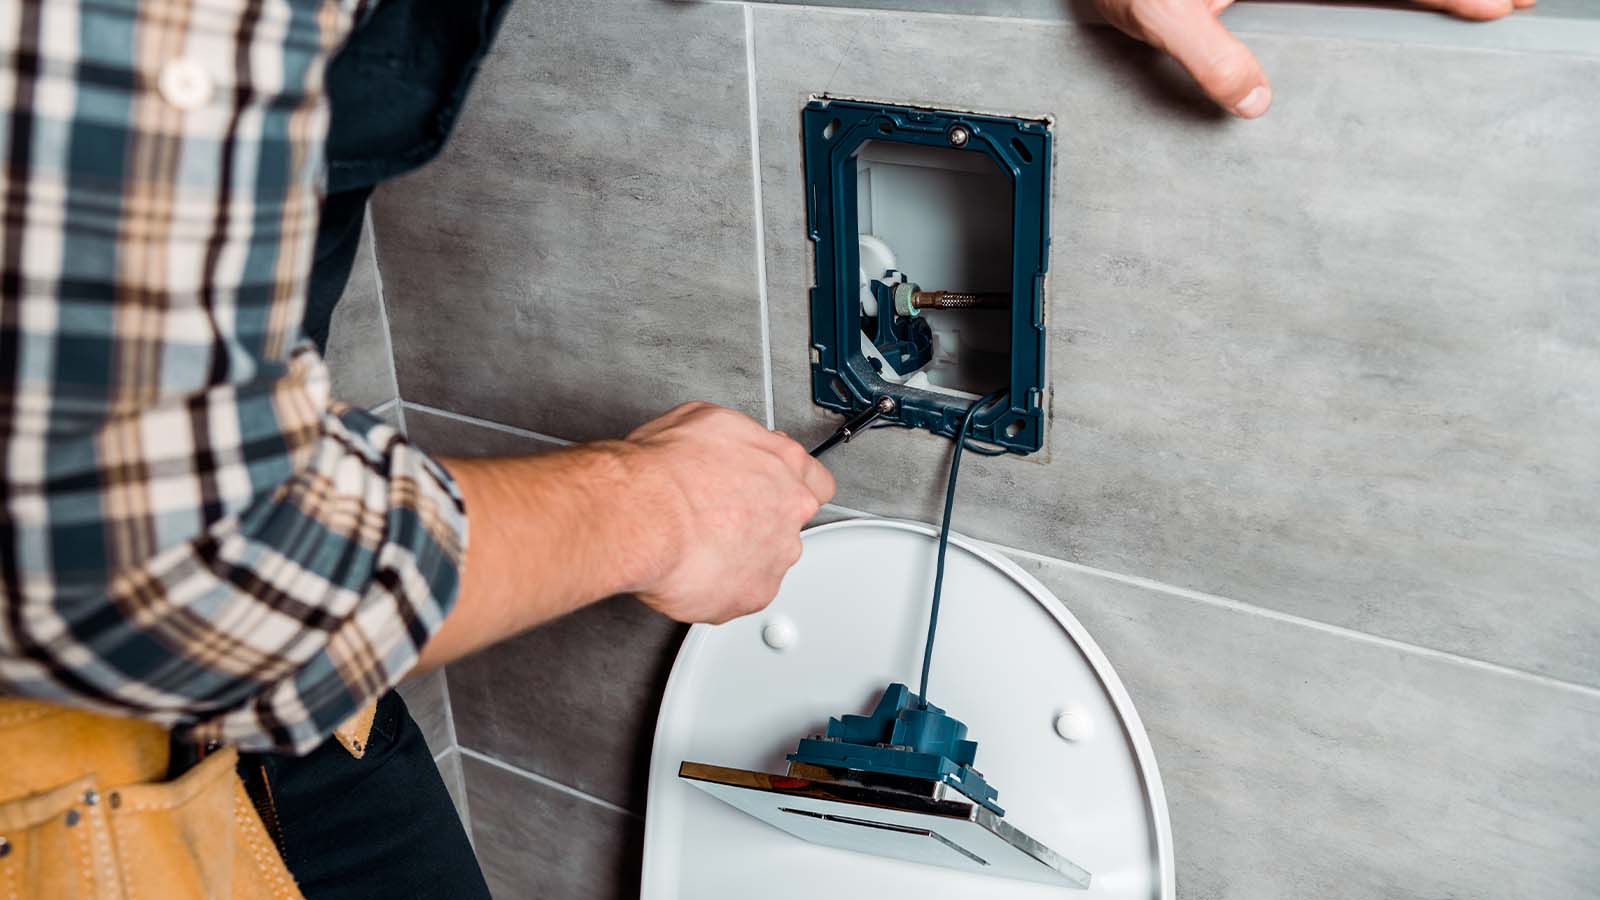
A stuck or unresponsive flush plate. Press the plate and nothing happens? On a concealed system the flush plate is just the visible button on the wall — behind it sit push-rods, cables, or pneumatic actuators that connect to the valve inside the tank. A jammed, cracked, or broken flush plate (or a rod that's slipped off behind it) is a common cause, and since most plates simply unclip from the wall, it's one of the easier parts to replace once you've confirmed the valve underneath is working.
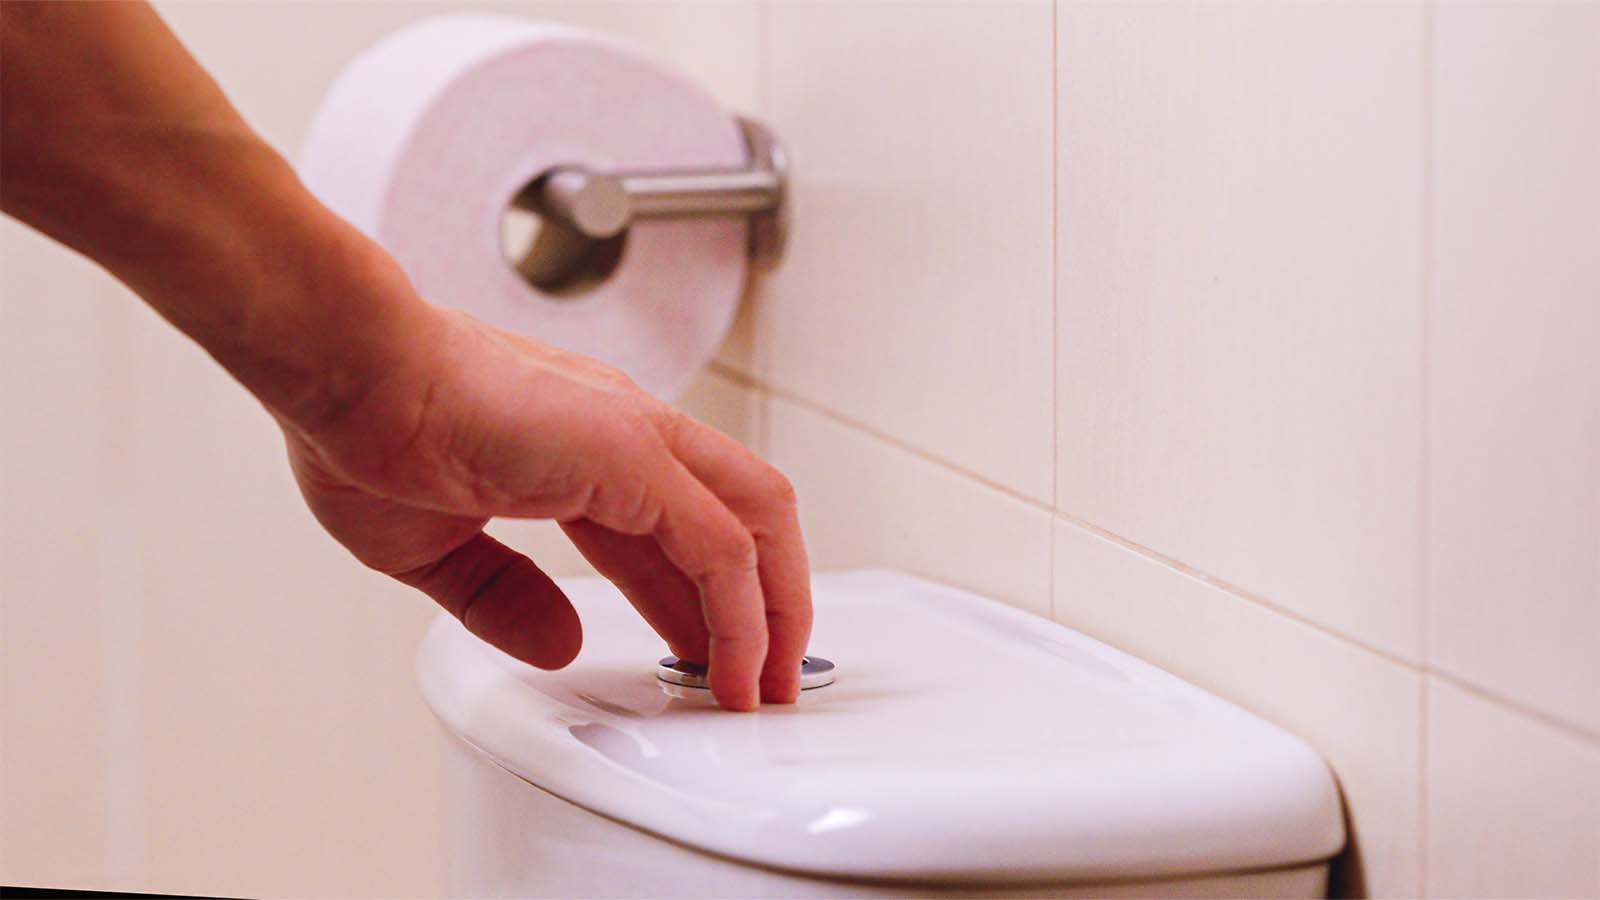
A broken flush button. On a lidded cistern, a button that's wobbly, sunken, or won't spring back is often just loose — the retaining ring or nut under the lid may only need hand-tightening. If the button is cracked or its return spring has failed, fit a new one; they're inexpensive and quick to change.
Excessive noise when refilling. Groaning, banging (water hammer), or a drawn-out whistling as the tank refills usually signals a worn fill valve, trapped sediment, or a diaphragm on its way out. Left alone, water hammer can stress joints elsewhere in your pipework, so a noisy refill is worth fixing rather than tuning out.
Quick rule of thumb: if the fault is a seal, washer, valve, button, or plate, you're almost always looking at a repair or a single-part swap. If the cistern or tank body itself is cracked or corroded, it's time for a full replacement.
Can You Repair It Instead of Replacing It?
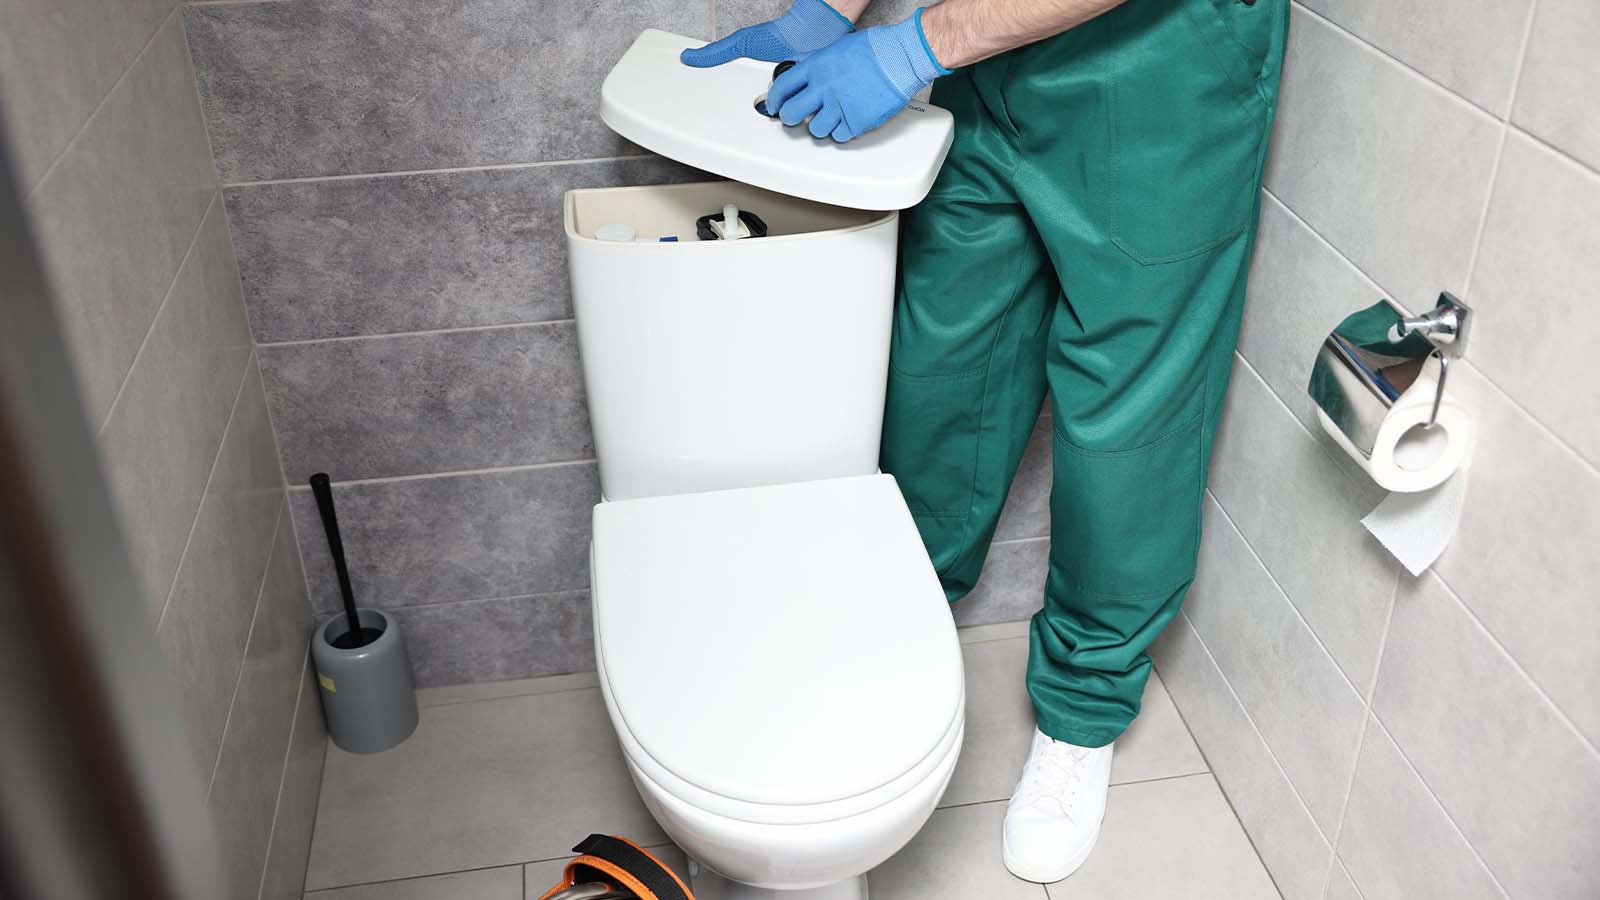
Before you shop for a new unit, know this: the large majority of cistern problems are repairs, not replacements. The ceramic bowl and the tank body usually outlast everything else — it's the working parts inside that wear out, and nearly all of them can be swapped individually. That's doubly true for a concealed cistern, where a full swap can mean opening up a tiled wall, so a targeted concealed cistern repair is almost always the cheaper, less disruptive route. Here's when a fix will do the job.
Repairs that usually solve the problem
Replacing the fill valve. The go-to fix for a cistern that keeps refilling, fills too slowly, or groans and whistles as it fills. Fill valves are near-universal and inexpensive, and on most cisterns they lift out with the water shut off and the tank emptied.
Replacing the flush valve or flush mechanism. A weak flush, a flush that won't stop, or a silent leak into the bowl usually traces back here. On many modern systems you replace the toilet flush valve as a complete cartridge; on older ones you may replace the toilet flush mechanism entirely. Parts typically run £15–£40 / $20–$40.
Changing seals or washers. This is the classic toilet cistern leaking repair — a perished diaphragm washer or tank-to-bowl gasket. The diaphragm alone often costs £2–£3 / $3–$5 and is a ten-minute job with no plumbing experience needed.
Cleaning limescale buildup. In hard-water regions (much of the UK, southern Europe, and large parts of the US), scale clogs valves and the rim jets under the bowl. Descale with white vinegar rather than harsh in-cistern tablets — drop-in bleach blocks perish the rubber parts and shorten their life, so avoiding them is basic concealed cistern maintenance.
Replacing only the flush plate. If the plate is cracked, jammed, or dead but the valve behind it works, you can replace the flush plate or replace the dual flush button on its own. Most plates simply unclip from the wall, making this one of the cheapest and quickest fixes of all.
The concealed cistern catch: can you still get the part?
For concealed and wall-hung systems, the real question isn't how bad is the fault? — it's is the matching spare still available? Parts generally must be an exact match to the brand and model. If the model has been discontinued and no compatible part exists, even a minor fault can force a full replacement
So the first step in how to repair a concealed toilet cistern without ripping out the wall is identification: find the exact make and model (often printed inside the tank, on the valve, or behind the flush plate), then source the matching component. Get that right and concealed toilet cistern repair stays a parts job rather than a building job.
When replacement is the right call
A cracked ceramic body — cracks spread under water pressure and repairs rarely hold, with a real risk of sudden flooding. Replace it, don't seal it.
An obsolete model with no available spares — as above, no part means no repair.
Multiple parts failing at once — when the combined cost of fill valve plus flush valve plus gaskets approaches the price of a new unit.
Persistent leaks after you've already replaced the internals — this points to the tank body or mounting surface itself, not the parts.
Repair or replace: quick reference
A cracked ceramic body — cracks spread under water pressure and repairs rarely hold, with a real risk of sudden flooding. Replace it, don't seal it.
An obsolete model with no available spares — as above, no part means no repair.
Multiple parts failing at once — when the combined cost of fill valve plus flush valve plus gaskets approaches the price of a new unit.
Persistent leaks after you've already replaced the internals — this points to the tank body or mounting surface itself, not the parts.
|
Problem |
Repair? |
Replacement Needed? |
Typical fix & rough cost |
|
Sticking flush button |
✓ |
Rarely |
Tighten or swap the button/plate; free the actuator — £5–£20 / $5–$25 |
|
Leaking seal |
✓ |
Sometimes |
New washer, diaphragm, or tank-to-bowl gasket — £2–£15 / $3–$20 |
|
Cracked cistern |
✗ |
Yes |
No safe repair — fit a new cistern/tank |
|
Broken internal mechanism |
✓ |
Sometimes |
Replace the fill or flush valve (whole matched unit on a concealed system) — £15–£40 / $20–$40 DIY |
|
Old or obsolete model |
✗ |
Usually |
No spares available — replace the cistern, ideally with a water-efficient dual-flush |
The bottom line on cost: a DIY internal-parts fix usually runs from a couple of pounds or dollars up to around £30–£40 / $40. A plumber replacing a matched concealed valve tends to land around £80–£150 / $100–$200 plus the part, and opening a wall for frame repair can climb to £200–£500+ / $250–$650+. A single-part repair almost always wins on cost — the only time replacement makes financial sense is when the body itself is cracked or the spares no longer exist.
Tools You'll Need
Tools and Materials You'll Need to Replace a Toilet Cistern or Flush Plate
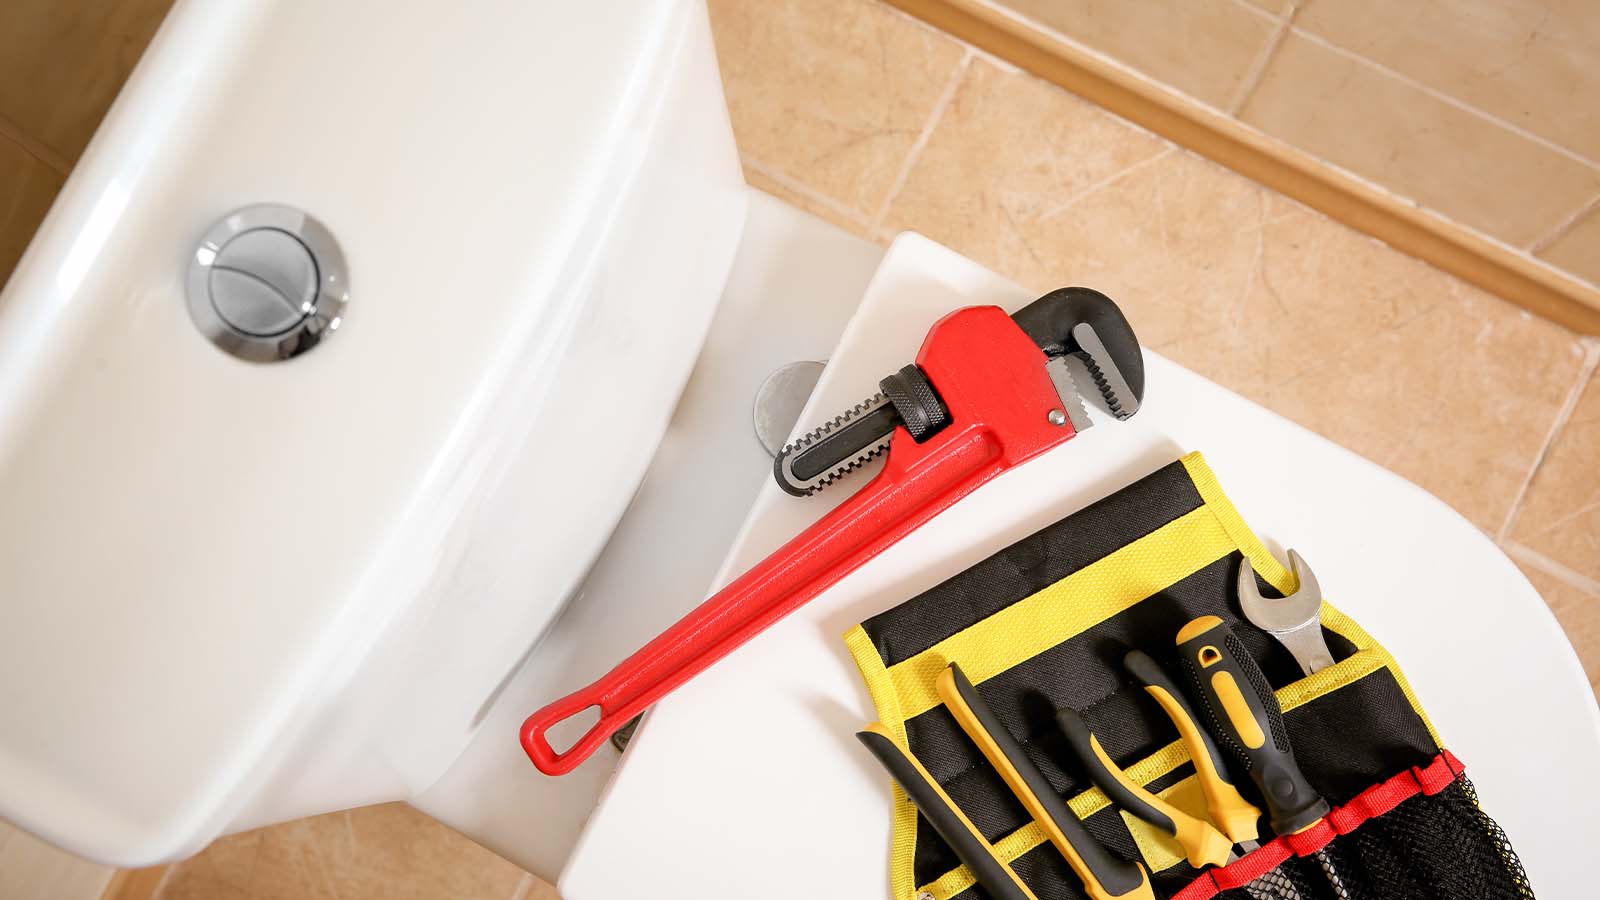
Lay everything out before you turn off the water. The most common way a simple job turns into a wet, stressful afternoon is stopping halfway to hunt for a tool. The good news is that a toilet cistern replacement needs only basic hand tools — you won't need anything specialist unless you're fitting a concealed cistern into a new wall. Here's the kit, and what each item is actually for.
The essentials
Adjustable spanner (adjustable wrench):These are the same tool under two names — spanner in the UK and Europe, wrench in the US. It's your main tool for loosening and tightening the supply-line nut, the cistern-to-pan bolts, and the large plastic lock-nut that holds the fill and flush valves in place. Tighten to hand-snug, then a quarter-turn more — never crank it, or you risk cracking the porcelain.
Screwdriver (flat-head and cross-head): Used to open or close the shut-off valve (the isolation valve, in UK terms), hold the cistern bolt heads still from inside while you undo the nuts underneath, and unclip or unscrew a flush plate or push-button assembly. A flat-head also doubles as a gentle lever for prising off a stubborn flush plate.
Bucket: Sits under the supply connection to catch the water that always drains out when you disconnect the hose, and holds the water you bail from the tank. There's always more left in the cistern than you expect.
Towels: Spread them around the base to soak up spills and protect the floor — keep a couple more than you think you'll need. An old towel or a sheet of cardboard also gives you a soft, safe surface to rest the removed cistern on so you don't chip the ceramic.
Sponge:For mopping the last of the water out of the bottom of the cistern once it's drained, and wiping the sealing surfaces clean so the new gasket beds down flat and watertight.
Silicone sealant (only if required): Not needed for most standard close-coupled swaps, where rubber gaskets do all the sealing. You'll want it for concealed and wall-hung installs, for bedding a pan to the floor, or for sealing a flush plate or access panel neatly against tiles. Use a bathroom-grade, mould-resistant sanitary silicone rather than general-purpose sealant.
The replacement cistern or flush plate: The part itself — and this is the one to get right before you start. Check the bolt spacing (180 mm is the common standard, but confirm yours), the flush-outlet size, and — for a concealed cistern or when you replace the flush plate — the exact brand and model, so the new part matches the frame and valve already behind the wall.
Worth having on hand (the extras most guides forget)
Your core list is solid, but a few cheap additions make the job far smoother and are recommended by nearly every experienced fitter:
PTFE / thread-seal tape — wrap two to three turns clockwise around the supply-line thread for a leak-free connection. Skipping this is one of the most common causes of a slow weep after refitting.
Penetrating oil — spray it on corroded or seized cistern bolts, wait ten minutes, and they'll usually free up. Old, rusted fittings are the number-one reason a quick job runs long.
A torch (flashlight) — for inspecting the dark inside of the cistern or the hidden concealed frame, where wear and leaks tend to hide.
A measuring tape — to confirm bolt spacing and part dimensions before you buy, so the replacement actually fits.
A plastic scraper — for removing old gasket material and limescale. Never use a metal blade on porcelain; it scratches the glaze and ruins the seal.
A small hacksaw and a scrap of cardboard — a last resort for cutting through a bolt that won't budge, with the cardboard held behind it to shield the porcelain from the blade.
Rubber gloves and your phone — gloves for grip and hygiene; your phone to photograph the existing setup before you dismantle it, which makes reassembly far easier.
A new braided supply hose — if the existing flexi hose is more than about five years old, swap it while you're in there. They're inexpensive, and a failed hose can flood a bathroom.
One note for concealed systems specifically: a flush-plate or valve job often needs barely any tools at all. Most plates simply unclip or slide off by hand, though some are held by the flush rods (turn them anticlockwise to release) or a hidden clip, and a sealed access panel may need its silicone bead cut with a utility knife first.
How to Replace an Exposed Toilet Cistern
An exposed cistern — the close-coupled tank that sits directly on top of the pan, or a low-level cistern joined by a short flush pipe — is the most straightforward type to swap, and how to replace a toilet cistern of this kind is well within reach for a confident DIYer in about two to three hours. Before you start, one quick note on rules: in the UK and most of Europe a toilet cistern replacement is generally fine as DIY, though any fittings on the incoming supply should meet local water regulations (look for WRAS-approved parts in the UK). In parts of the US and Australia, work on the supply connection can require a licensed plumber, so check your local requirements if you're unsure.
Follow these steps in order — the sequence matters.
Turn off the water supply. Find the isolation valve on the pipe behind or beside the toilet (a small screw or lever). Turn it a quarter-turn clockwise, or with a flat-head screwdriver until the slot sits horizontal to the pipe. No valve, or it won't move? Shut off at the mains stopcock instead. Confirm the water is genuinely off before going further.
Flush the toilet to empty the cistern. Hold the flush lever or button down to drain as much water as possible into the bowl. With the supply off, the cistern won't refill.
Drain any remaining water. Bail out the last of it with a cup, then mop the bottom dry with your sponge. A dry cistern is lighter, far less messy to lift, and you need the sealing surfaces clean and dry for the new gasket anyway.
Disconnect the water supply. Put your bucket under the connection first. Undo the flexible hose nut at the cistern inlet with your spanner, holding the inlet valve steady with your other hand so it can't spin and crack. If the nut is seized, spray on penetrating oil and wait ten minutes. Inspect the hose while it's off — if it's cracked or more than about five years old, fit a new braided one.
Remove the old cistern. Undo the cistern-to-pan bolts: hold each bolt head still inside the tank with a screwdriver while you loosen the nut underneath with your spanner. Corroded bolts get penetrating oil first, and only as a last resort a careful cut with a hacksaw — hold a scrap of cardboard behind the blade to protect the porcelain. With the bolts out, lift the cistern straight up, rocking gently to break the old gasket seal. It's heavy (roughly 5–10 kg empty), so lift with your legs, and get a second pair of hands if it's awkward. Rest it on a towel or cardboard, then scrape the old doughnut gasket off the pan with a plastic scraper — never a metal blade, which scratches the glaze.
Install the new cistern. Fit the fill valve and flush valve (or full flush mechanism) into the new cistern first, while it's on the bench and you have clear access — this is far easier than reaching in after it's mounted, and it's the step most rushed jobs get wrong. Fit new bolts with new rubber cone washers and a new doughnut gasket; never reuse old seals. Lower the cistern squarely onto the pan over the bolt holes, then tighten the nuts evenly, alternating side to side, to hand-tight plus about a quarter-turn. Check it sits level and doesn't rock.
Reconnect the water. Wrap two to three turns of PTFE tape clockwise around the supply thread, reconnect the flexible hose, and tighten by hand then a small nudge with the spanner. Reopen the isolation valve slowly — a gradual refill avoids water hammer and lets you spot problems before the tank is full.
Test for leaks. As the cistern fills, watch and feel every joint: the pan bolts, the gasket between cistern and pan, and the supply connection. Run a dry finger around each one — it catches slow weeps the eye misses. Then run five to ten flushes over the next hour, checking after each. If you find moisture, tighten that joint a touch, but resist the urge to over-crank.
Adjust the flush mechanism if necessary. Set the water level to the marked line inside the tank, or roughly 20–25 mm below the top of the overflow, by moving the fill valve's float up or down. Test both the full and half flush on a dual-flush system. If the flush is weak or won't stop, fine-tune the valve or button travel — this is also the point to seat or replace the dual flush button if it isn't sitting flush in the lid.
Over-tightening the pan bolts. This is the single most expensive DIY error — porcelain cracks under pressure. Hand-tight plus a quarter-turn is the target, and stop the moment it feels firm.
Reusing old gaskets and washers. Old rubber has taken a set and won't reseal. Fitting new seals is cheap insurance against a leak you'll only discover once the floor is wet.
Forgetting PTFE tape on the inlet thread. A bare thread is a classic cause of a slow weep after refitting. Two or three clockwise wraps sorts it.
Turning the water back on too fast. A sudden surge can hammer the joints and hides small leaks in the rush of filling. Open the valve slowly.
Buying an incompatible cistern. Measure the bolt spacing (around 180 mm is standard, but confirm yours) and check the outlet size before you buy, not after the old one's off.
Letting the inlet valve spin. Undoing the supply nut without bracing the valve can twist and crack it — always hold it steady.
Skipping the leak test. A slow leak behind or beneath the toilet can quietly rot flooring and stain the ceiling below. The one-hour test is worth the wait.
How to Replace a Concealed Toilet Cistern
Many homeowners take one look at a wall-hung toilet with no visible tank and assume a concealed cistern repair means ripping out tiles and rebuilding the wall. Almost always, it doesn't. Concealed and wall-hung systems are deliberately engineered to be serviced from the front, through the flush plate — the manufacturers know parts wear out, so they built in access. The tank behind the wall is typically a durable plastic cistern inside a metal frame , and its working parts are designed to be swapped individually. So while a full concealed toilet cistern replacement is genuinely rare, replacing the valves, seals, flush mechanism, or the plate itself is a realistic DIY job once you know how the access works.
Access through the flush plate opening
The flush plate is your service hatch. Behind it sits a rectangular opening in the wall — the manufacturer's designed access point to the cistern.
Start by removing the plate. Most dual flush plates either lift up and off, pull straight out, or unclip after you release two buttons or rods (the exact method depends on the brand, so check the model). Some pneumatic and cable-operated plates have a small frame or top edge you ease off first. Once the plate is off, you'll usually see the two flush push-rods or actuator, the manual flush override, and — crucially — the flush valve cartridge and the top of the fill valve sitting just inside the opening. On most modern frames, the entire flush valve lifts out through this hole after a quarter-turn or a release clip, and the fill valve's shut-off is accessible here too. This single opening is enough for the large majority of concealed cistern repairs.
Removing the service panel
Not every install has a flush-plate-sized opening. Back-to-wall units, where the cistern hides in a slim cabinet or a boxed-in section rather than a solid wall, usually have a removable service panel — a screwed or clipped access hatch in the furniture, plinth, or side of the boxing.
Look for a discreet panel, a run of screws under a trim strip, or a magnetic push-catch. If the panel has been sealed with silicone during installation, run a sharp utility knife along the bead to release it before you try to lever it off. Behind it you'll have far more room to work than a flush plate allows, with clear access to the whole cistern, the supply connection, and the mounting frame. Keep the fixings and note the panel's orientation so it goes back cleanly.
Disconnecting the internal components
With the access open, the order of work mirrors an exposed cistern, just in a tighter space:
First, isolate the water. Concealed systems have an integral shut-off built into the fill valve, reachable through the opening — turn it off there, or shut the mains if you can't reach it. Flush to empty the tank and sponge out any residue. Then work through the parts you're replacing: the flush valve cartridge normally releases with a twist or a clip and lifts straight out; the fill valve disconnects from the internal supply and comes out the same way; seals and gaskets simply pull off once the valve is clear.
Two things make or break this stage. Photograph everything before you disconnect it — the rod positions, the valve alignment, the seal seating — because concealed layouts are fiddly to reassemble from memory. And confirm you have the exact matching part before you remove the old one. This is the real catch with concealed systems: components must generally match the precise brand and model, merchants rarely stock them, and you often order by model number online. Identify the make and model (frequently printed on the valve, inside the cistern, or behind the plate) first, so you're never left with an open wall and no part to fit.
When the wall needs to be opened (rare)
Opening the wall is the exception, not the rule, and it's usually a sign of one of the following:
The cistern body or frame itself is cracked or corroded, not just the internal parts — the one case where you may need a true concealed toilet cistern replacement.
The original installer sealed or tiled directly over the access with no flush plate opening or service panel left (poor practice, but it happens).
A leak is coming from a pipe joint or the frame behind the tank, out of reach of the flush-plate opening.
The model is discontinued with no compatible spare available anywhere, forcing a full frame-and-cistern swap.
Even then, in a tiled bathroom the reality is that opening the wall often means re-tiling and sometimes re-waterproofing, which is why matching a repairable part is nearly always the better route.
When professional help is advisable
DIY suits flush-plate and service-panel work where the access is clear and the matching part is in hand. Bring in a professional plumber when:
The job means opening a tiled or sealed wall, or repairing the frame, waterproofing, or the studwork behind it.
You can't identify the make and model, or can't find compatible parts — an experienced fitter often knows the system and where to source spares.
There's a hidden leak you can't locate, or signs of water damage (damp walls, soft flooring, a musty smell) that need investigating before anything is re-sealed.
The supply connection needs reworking and local rules require a licensed plumber for that work.
The frame feels loose or the wall-hung bowl moves — that's a structural fixing issue, not a parts issue, and it needs doing right.
The honest rule of thumb: if you can reach the fault through the plate or panel and you have the correct part, it's a confident-DIYer job. If the answer involves the wall, the frame, or a leak you can't see, that's when the cost of a plumber is money well spent.
How to Change a Flush Plate
Swapping the flush plate is the easiest job on a concealed toilet and one of the most satisfying — a cracked, discoloured, or dated plate is often the only visible part of the whole system, so a new one instantly refreshes the look. It's also the fix when the button feels dead, stuck, or spongy but the valve behind it still works. The whole job takes ten to twenty minutes with little more than your hands and a flat-head screwdriver, and knowing how to change a flush plate properly comes down to one thing above all: matching the new plate to your existing frame before you buy it.
Step 1: Remove the existing flush plate
Flush plates are designed to come off without tools, but the release method varies by brand and mechanism, so identify yours first:
Lift-off plates — push the plate gently upward, then pull the bottom edge toward you and lift it clear of the two locating lugs at the top.
Clip-on plates — ease a flat-head screwdriver under the edge and gently prise; the plate unclips from the frame surround.
Frame-and-cover plates — pop off the outer button cover first (it usually lifts or levers off), which exposes screws or clips holding the mounting frame.
Work slowly and evenly. If the plate resists, check for a hidden screw or a silicone bead sealing it to the tiles, and slice any sealant with a utility knife before pulling. Never force it — brittle plastic cracks, and you don't want to snap a lug still attached to the frame.
Step 2: Disconnect the rods or pneumatic tubes
Behind the plate is the mechanism that links your press to the valve, and it's one of two types:
Push-rods (mechanical) — two rigid plastic rods (one per flush volume on a dual flush) that push directly onto the valve actuator. Note their length and position, then unclip or lift them off. Many simply pull away; some twist a quarter-turn to release.
Pneumatic tubes (air-actuated) — one or two thin flexible tubes that carry a puff of air to the valve when you press. Ease each tube off its connector gently and note which port it came from. These are easy to muddle on a dual flush, so this is the moment to photograph the layout.
Cable-operated systems work similarly — unhook the cable end from the plate. Whatever the type, take a picture before anything comes off; reconnecting from memory is where this job goes wrong.
Step 3: Check compatibility (do this before you buy)
This is the step that saves a wasted purchase and a second trip. Flush plates are not universal — a plate has to match your specific frame, and getting this right before ordering is essential. Confirm:
Brand and frame model — Find the model on the frame, the old plate's back, or the original paperwork.
Actuation type — mechanical push-rod, pneumatic, or cable. A pneumatic plate can't drive a rod-operated valve, and vice versa.
Single vs dual flush — the plate must match your valve's flush setup.
Mounting dimensions and orientation — the opening size, fixing centres, and whether the plate mounts vertically or horizontally.
If you're upgrading the style rather than replacing like-for-like, check the manufacturer's compatibility chart — many brands list exactly which plates suit which frames. When in doubt, buy the same plate you removed, or take the old one (and its model number) to the supplier.
Step 4: Install the new flush plate
With a confirmed-compatible plate in hand, reverse the removal:
Reconnect the mechanism first — push the rods back onto the valve actuator at the correct length, or refit the pneumatic tubes to their matching ports (this is where your photo pays off). Getting the full-flush and half-flush connections the right way round matters on a dual system.
Fit the mounting frame or surround into the wall opening if your plate uses one, and secure any clips or screws.
Seat the plate onto its lugs or clips and press it home until it sits flush and even against the wall. It should feel firmly located, not loose or proud.
Don't over-press or force anything into place — if it won't seat cleanly, a rod or tube is likely misaligned behind it, so take it off and recheck rather than pushing harder.
Step 5: Test the flush
Press each button and confirm it operates: a full flush from one, a reduced flush from the other on a dual plate. Check that each button travels smoothly and springs back cleanly with no sticking. Watch the bowl to confirm both flush volumes trigger correctly, and listen for the cistern refilling and shutting off properly. If a button feels dead or the flush won't trigger, the rod or tube behind it isn't seated — pop the plate and realign it. This same process is all a straightforward toilet flush button replacement takes, since on a concealed system the button is the plate.
Replacing Internal Cistern Parts
Most cistern problems come down to a single worn component, not a failed tank — which means the fix is usually a cheap part and a bit of time, not a full unit. The ceramic or plastic body rarely fails; it's the working parts inside that wear, perish, or scale up. Learning to replace the toilet flush mechanism or fill valve at the part level is the difference between a £5–£40 / $5–$40 repair and an unnecessary replacement. Here's each key part, what it does, the symptom that points to it, and what's involved in swapping it.
Fill valve (inlet valve)
The fill valve — also called the inlet valve — connects to the water supply and refills the tank after each flush, shutting off automatically when the float reaches the set level. In the UK and Europe you'll most often see a bottom-entry or side-entry valve with a float cup or arm.
Symptoms it's failed: the cistern won't stop filling, fills very slowly, overflows, or makes groaning, whistling, or water-hammer noises as it refills. To replace it: shut off the water, drain and dry the tank, disconnect the supply, and undo the retaining nut holding the valve to the cistern base. Lift the old valve out, fit the new one with fresh washers, and set the float to the marked water level. Fill valves are largely universal and among the easiest parts to change — this is often all a noisy or endlessly-running toilet needs.
Flush valve and outlet valve
The flush valve sits at the base of the cistern and releases the stored water into the bowl when triggered, then reseals so the tank can refill. On older UK toilets this is a siphon; on most modern systems it's a drop-valve cartridge (sometimes called the outlet valve). The seal at its base — a flapper or washer — is what actually holds water back between flushes.
Symptoms it's failed: water trickles constantly into the bowl (confirm with the dye test — colour in the bowl within 20–30 minutes means the seal is passing), the flush is weak, or the flush won't stop. To replace it: on a close-coupled cistern you usually lift the tank off the pan to reach the large lock-nut underneath and replace the toilet flush valve as a unit; on a concealed system the cartridge typically lifts out through the flush-plate opening after a twist or clip release. Sometimes only the base seal needs renewing rather than the whole valve — worth checking first, as it's the cheapest fix of all.
Push rods
On a concealed toilet with a mechanical flush plate, push-rods are the rigid plastic links that transfer your press on the plate to the valve actuator — one rod per flush volume on a dual-flush.
Symptoms they've failed: the button presses but nothing flushes, a rod feels loose or rattly, or one of the two flush volumes has stopped working while the other is fine. To replace them: remove the flush plate, note each rod's length and position, and unclip the old ones. Rods are brand- and frame-specific, so match them to your system — and this is a common, inexpensive fix for a plate that suddenly stops triggering the valve.
Pneumatic hoses
Air-actuated systems use thin flexible tubes instead of rods: pressing the plate sends a puff of air down the hose to operate the valve.
Symptoms they've failed: a soft or unresponsive button, a flush that only works intermittently, or one flush volume dead on a dual plate — often caused by a split, kinked, or disconnected tube, or a perished connector. To replace them: remove the plate, ease each tube off its port (photograph the layout first — it's easy to swap full-flush and half-flush on a dual system), and fit the replacement tubes to the matching connectors. Check the seals at each end while you're there.
Rubber seals, washers and gaskets
Rubber is the most common failure point in the whole cistern because it perishes, hardens, and takes a permanent set over time — accelerated in hard-water areas and by harsh in-cistern cleaning tablets.
Symptoms they've failed: leaks between the cistern and pan, weeping at the supply connection, water pooling at the base, or a silent leak into the bowl from a failed valve seal. To replace them: the main ones are the doughnut gasket between cistern and pan, the cone washers on the fixing bolts, the fill-valve inlet washer, and the flush-valve base seal. Always fit new seals whenever you take a cistern apart — old rubber won't reseal reliably, and a fresh set costs very little against the damage a slow leak causes.
Overflow components
Modern cisterns build the overflow into the flush valve as an internal standpipe — if the fill valve fails to shut off, excess water drains safely into the bowl rather than onto the floor. Older systems use a separate overflow pipe running through the cistern to outside.
Symptoms they've failed: water running continuously into the bowl from the overflow (a sign the fill valve isn't shutting off, or the water level is set too high), or on older toilets, water dripping from an external overflow pipe. To fix it: first check and lower the float/water level, and service the fill valve, since the overflow is usually doing its job by carrying away water the fill valve should have stopped. If the internal overflow standpipe or its seal is cracked, it's replaced as part of the flush valve assembly.
A quick diagnostic shortcut
Won't stop filling / noisy fill → fill valve
Trickling into the bowl / weak or non-stop flush → flush valve or its base seal
Button presses but no flush → push-rods or pneumatic hose
Leaking onto the floor or at the base → rubber seals and gaskets
Water draining into the bowl from the overflow → fill valve not shutting off / level set too high
Match the symptom to the part, confirm you can source the correct component (universal for most fill and flush valves; brand-specific for concealed rods, hoses, and plates), and you'll fix the vast majority of cistern faults without replacing the tank.
Choosing the Right Replacement Cistern
Buying the wrong cistern is a costly, frustrating mistake — the part arrives, and only then do you discover the bolts don't line up or the plate won't fit the frame. A little homework up front avoids all of it. The right choice comes down to matching the type, the dimensions, and the fittings to what you already have (or, if you're remodelling, to the space and bowl you're installing). Here's what to check before you buy.
Exposed vs concealed
The first decision is the type of system, and for a replacement it's usually dictated by what's already there.
Exposed cisterns sit in view — the close-coupled tank on top of the pan, or a low-level cistern on a short flush pipe. They're cheaper, simpler to fit, and easy to service, since everything is accessible. If you're replacing like-for-like, this is the straightforward route.
Concealed cisterns hide inside a wall, frame, or furniture unit, with only the flush plate and bowl on show — the clean, modern look. They cost more and demand exact-match parts, but you rarely replace the whole unit; more often you're renewing internal components or the plate. If you already have concealed, you're almost always better matching the existing frame's brand and model than swapping the system.
Switching between types (exposed to concealed or vice versa) isn't just buying a cistern — it usually means new framework, wall work, and often a new pan, so treat that as a remodel rather than a swap.
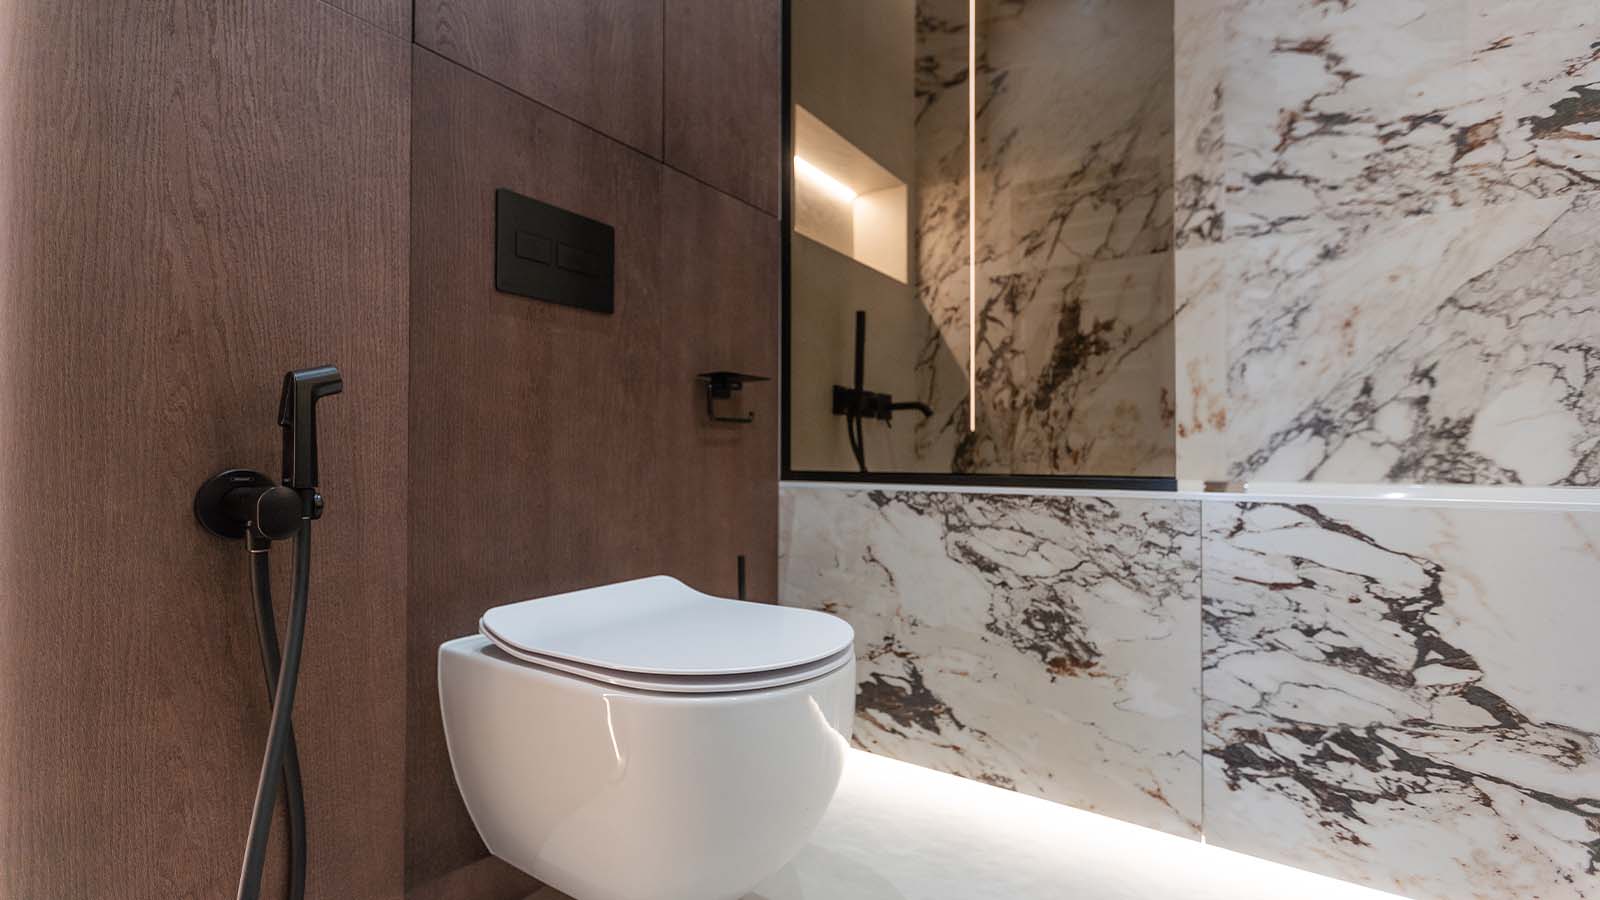
Wall-hung vs back-to-wall
Both are concealed systems, but they mount very differently, and this affects what cistern and frame you need.
Wall-hung toilets bolt the bowl to a heavy-duty steel frame inside the wall, with nothing touching the floor. The frame carries the full load, so it must be rated for it (typically around 400 kg) and fixed to a solid, properly built wall. Best for renovations and new builds where the frame can be installed from scratch.
Back-to-wall toilets sit on the floor with the pan pushed against a wall or a slim cabinet that hides the cistern. Easier to install than wall-hung, with less structural demand, and usually easier to access for repairs — a practical middle ground between exposed and fully in-wall.
Match the cistern or frame to the mounting you have. A wall-hung frame and a back-to-wall cabinet cistern are not interchangeable.
Slimline models
Slimline (slim-depth) concealed cisterns and frames are made for tight spaces — small cloakrooms, stud walls with limited depth, or where the cistern boxes out less far into the room. If depth is your constraint, check the frame's build-in dimensions carefully, as slimline units hold their water in a shallower, wider tank and may pair with specific plates. They're a good fit for compact bathrooms, but confirm the reduced tank still delivers a full flush volume for your bowl.
Capacity (flush volume)
Modern cisterns are dual-flush, and capacity matters for both performance and water bills. UK and European standards centre on a 6/4 or 4.5/3 litre full/reduced flush; the US measures in gallons, with current models at 1.28 GPF or the older 1.6 GPF. Two points to get right:
Match the volume to the bowl. A bowl designed for 6 litres may clear poorly on a 4-litre flush, and vice versa — mismatched capacity is a common cause of a weak flush after a new cistern.
Don't under-buy on efficiency alone. A water-saving flush that needs a double-press to clear the bowl saves nothing. Pair the right volume with a bowl designed for it.
Compatibility with your existing toilet
If you're keeping the bowl, the cistern has to fit it. Before buying, measure and confirm:
Bolt spacing — the distance between the cistern-to-pan fixing holes (around 180 mm is a common standard, but confirm yours).
Outlet size and position — the flush outlet must line up with the bowl's inlet.
Overall footprint — that the tank sits correctly on the pan's flat and against the wall without fouling pipework.
Take the old cistern's measurements (or the old unit itself) to the supplier. Matching the brand and range of your existing pan is the surest way to guarantee a clean fit, especially with close-coupled sets.
Flush plate compatibility (for concealed systems)
If you're replacing a concealed cistern or its plate, frame-to-plate matching is critical — this is the number-one concealed buying error. Plates are not universal. A plate must match the frame's brand, model generation, and actuation type (mechanical push-rod, pneumatic, or cable). Always check the manufacturer's compatibility chart, or match the exact model of the frame you have, before ordering either a new plate or a replacement cistern.
WRAS approval and water regulations
Finally, buy fittings that meet your region's water regulations — this protects the mains supply from contamination and keeps your installation compliant.
In the UK, look for WRAS-approved products (Water Regulations Advisory Scheme), which confirm the fitting meets the Water Supply (Water Fittings) Regulations.
Across Europe, look for equivalent national approvals and CE-marked compliance.
In the US, look for products meeting EPA WaterSense criteria for efficiency, alongside local plumbing-code compliance.
Approved parts aren't just red tape — using unapproved fittings can breach water regulations and, in some cases, affect your insurance. It's a small check that confirms the product is safe, efficient, and legal to install.

Common Problems During Replacement
Even a straightforward swap can throw up a surprise — a bolt that won't budge, a joint that weeps, a new plate that does nothing. Almost all of them have a simple cause and a quick fix. Here are the problems that come up most often during a toilet cistern replacement, and exactly what to do about each.
Water won't shut off
What's happening: you've closed the isolation valve but water still trickles into the cistern, or the valve itself is seized and won't turn. Older isolation valves often corrode internally and stop sealing fully.
What to do: if the isolation valve won't fully stop the flow, shut off the water at the mains stopcock instead — usually under the kitchen sink or where the supply enters the property. Then open a downstairs tap to drain the pressure from the pipes before you disconnect anything. If the isolation valve is seized, don't force it (a snapped valve floods the job); shut the mains and, if you're comfortable, replace the faulty isolation valve while you're there — it's a cheap part and far easier to change with the water off.
Rusted or seized bolts
What's happening: the cistern-to-pan bolts are corroded solid and the nuts won't turn, or they spin the whole bolt without loosening.
What to do: spray the nut and thread with penetrating oil and leave it a good ten to fifteen minutes — don't rush this, it does most of the work. Grip the bolt head still from inside the tank with a screwdriver while you turn the nut. If it still won't move, cut the bolt with a small hacksaw or a rotary tool, holding a scrap of cardboard behind the blade to protect the porcelain, and cut slowly — the moment the blade touches ceramic you risk a crack. Always fit brand-new bolts and cone washers on reassembly; never reuse corroded ones.
Misaligned pipework
What's happening: the new cistern's inlet or outlet doesn't line up with the existing supply pipe or the bowl's inlet, leaving the connection strained or impossible to seat squarely.
What to do: never force a rigid pipe to meet a fitting — the strain will crack the valve or the porcelain, if not now then later. Fit a flexible braided supply hose, which absorbs small offsets and is the easy cure for a supply pipe that doesn't quite meet the inlet. For a cistern-to-pan outlet that's slightly off, check you have the correct doughnut gasket and that the cistern is sitting square before tightening; if the mismatch is significant, the cistern may not be the right model for the pan (recheck bolt spacing and outlet position). Small alignment issues are normal; a connection under visible tension is not.
Flush plate not working after installation
What's happening: you've refitted everything, you press the plate, and nothing flushes — one of the most common post-install complaints, and almost always a linkage problem rather than a faulty valve.
What to do: remove the plate and check the mechanism behind it. On a push-rod system, the rods have probably slipped off the valve actuator or aren't seated at the right length — reseat them so they contact the actuator squarely. On a pneumatic system, a tube has likely popped off its port, split, or been connected to the wrong connector (easy to do on a dual flush) — refit each tube to its correct port. Confirm the flush valve underneath actually operates when pressed manually; if it does, the fault is purely in the plate linkage. This is why photographing the layout before removal matters so much — reconnecting from a picture takes seconds.
Leaking connections
What's happening: water weeps from the supply connection, from between the cistern and pan, or from the base after you turn the water back on.
What to do: trace the source first — run a dry finger or a piece of tissue around each joint to pinpoint it. Supply-line weep: turn the water off, remake the joint with two to three clockwise wraps of PTFE tape, and tighten hand-tight plus a small nudge — don't over-crank. Leak between cistern and pan: almost always the doughnut gasket isn't seated evenly or the bolts are uneven — check the gasket sits flat and tighten the pan bolts a little at a time, alternating sides. Base leak: confirm you fitted new seals and didn't reuse old rubber. Resist the urge to solve a leak by brute-force tightening; over-tightening cracks porcelain and often makes the leak worse.
Incorrect flush volume
What's happening: the new cistern flushes too weakly to clear the bowl, or uses far more water than expected, or the dual-flush buttons don't deliver distinct full and reduced volumes.
What to do: first, set the water level to the marked line inside the tank (or ~20–25 mm below the overflow) by adjusting the fill valve's float — an under-filled cistern is the most common cause of a weak flush. Most modern flush valves also let you set the full and half-flush volumes independently via an adjuster on the valve or the float collar; tune these to your bowl. If it still clears poorly at the correct level and settings, the cistern's capacity may simply be mismatched to the bowl (a common issue covered in choosing the right cistern) — the bowl and flush volume need to be designed for each other.
Loose mounting brackets
What's happening: the cistern, frame, or wall-hung bracket feels loose or moves, or a back-to-wall/concealed frame isn't sitting solid against the wall.
What to do: never leave a moving fixing — on a wall-hung system especially, the frame carries the full weight of the bowl and user, so it must be bolted to a sound, load-rated structure. Check the frame's fixings into the wall are tight and into solid material, not just plasterboard or tile. For a close-coupled cistern, a slight wobble usually means the pan bolts need even tightening (a little at a time, side to side) or that the wall bracket behind the cistern needs securing. If the wall itself won't hold a fixing, that's a structural job — stop and get it done properly rather than relying on a bracket that's already loose.
A quick pre-finish checklist
Before you call the job done, run through these:
Water level set to the marked line, full and reduced flush both working
Every joint checked dry with a finger over several flushes across an hour
All bolts firm but not over-tightened, cistern sitting level and not rocking
Flush plate seated flush and both buttons springing back cleanly
No new seals reused, and a new supply hose fitted if the old one was ageing
How Long Does It Take?
How long a toilet cistern replacement takes depends almost entirely on the type of job — swapping a flush plate is a quick before-work task, while a concealed cistern with awkward access can fill an afternoon. Here are realistic time estimates for a competent DIYer, plus what pushes each one longer.
Job | Typical time | What affects it |
Flush plate replacement | 10–20 minutes | Release method and reconnecting the rods or tubes correctly |
Internal valve replacement (fill or flush valve) | 20–45 minutes | Whether you must lift the cistern off to reach the valve |
Exposed cistern replacement | 1–2 hours | Seized bolts, supply access, and buying the right part |
Concealed cistern replacement | 2–5 hours | How the system is accessed — flush plate, service panel, or wall |
A few things worth knowing about those numbers:
The estimates assume you already have the correct part in hand. For concealed systems, sourcing the exact-match component can add days of waiting even though the fitting itself is quick — so order and receive the part before you start.
Plan for the whole window, not just the hands-on time. An exposed swap is genuinely an hour or two of work, but the leak test alone runs five to ten flushes over about an hour before you can safely call it done.
Concealed times swing widely on access. A repair reached through the flush plate opening sits at the shorter end; one behind a sealed service panel takes longer; and the rare case of opening a tiled wall (plus re-tiling and re-sealing afterwards) can turn it into a one-to-two-day job — which is exactly why matching a repairable part beats opening the wall.
The usual time-sinks are predictable. Corroded bolts that need penetrating oil or cutting, a seized isolation valve, mismatched pipework, or a second trip to the supplier for the right part are what turn a one-hour job into three. Having penetrating oil, PTFE tape, a spare braided hose, and the correct part ready beforehand keeps you at the shorter end of every estimate.
First-timer tip: if this is your first time, add roughly 50% to these figures and give yourself a clear half-day for an exposed swap. It's far better to have spare time than to be mid-job with the water off and no way to finish before the shops close.
DIY or Hire a Plumber?
The honest answer to should I do this myself? comes down to one question: can you reach the fault, and do you have the right part? If the job is accessible and parts-level, it's well within reach for a confident DIYer. If it involves the wall, the frame, or hidden pipework, the balance tips toward a professional. Here's how the options compare, and why the line falls where it does.
When DIY makes sense
These jobs are accessible, low-risk, and need only basic hand tools:
Flush plate replacement — the easiest job of all, usually tool-free, done in 10–20 minutes. As long as you match the plate to your frame, there's little that can go wrong.
Internal valve replacement — swapping a fill or flush valve is a cheap, contained repair with minimal water exposure. The main skill is not over-tightening and fitting new seals.
Exposed cistern replacement (if confident) — a close-coupled or low-level swap is one of the more approachable plumbing jobs, provided you're comfortable working with the supply connection, can handle the weight of the tank, and have confirmed the replacement fits. The risks — cracked porcelain from over-tightening, or a leak from a reused seal — are all avoidable with care.
The common thread: everything is in front of you, the parts are standard or easily matched, and a mistake means a re-do rather than damage to the building.
When to call a professional
These jobs carry more risk, need specialist judgement, or involve the structure of your bathroom:
Concealed cistern replacement — replacing a full concealed or wall-hung unit (as opposed to servicing it through the plate) often means working in a tight cavity, matching exact-brand parts, and sometimes touching the frame or wall. A pro who knows the system will source the right parts and fit it right. (Servicing a concealed cistern through the flush plate is still fine as DIY — it's a full unit swap that warrants help.)
Structural alterations — anything involving a wall-hung frame, load-bearing fixings, or building out a wall to house a cistern. The frame carries the full weight of the bowl and user, so it must be fixed correctly to a sound structure — not a job to improvise.
Persistent leaks — a leak that continues after you've replaced the obvious seals, or one you can't locate, points to something behind the accessible parts. A professional can trace it and check for hidden water damage before it rots flooring or reaches the room below.
In-wall pipework — any work on concealed supply or waste pipes behind a finished wall. In many regions this is also licensed plumbing work, and getting it wrong means opening the wall again.
Weighing up cost vs risk
Cost is part of the decision, but so is what's at stake if it goes wrong:
DIY parts are cheap — a flush valve, fill valve, or plate typically runs £5–£40 / $5–$40, and an exposed cistern £50–£150 / $80–$150. The saving is mostly labour.
A plumber for a straightforward exposed swap or valve job commonly runs around £80–£200 / $100–$250 including labour; a concealed valve replacement sits higher because parts must be matched and sometimes researched; and opening a wall for frame or pipework repair can reach £200–£500+ / $250–$650+.
The real risk of DIY isn't the part cost — it's water damage. A cracked pan, a leak into the ceiling below, or a wall-hung frame that isn't fixed properly costs far more than the plumber you skipped. If the job touches the wall, the frame, or a leak you can't see, the professional is money well spent.
A simple rule of thumb: if you can reach it through the plate or panel and you've got the right part, do it yourself. If the answer involves the wall, the frame, or hidden pipework, get a professional. And if at any point you're unsure whether the water is fully off or the fixing is sound — stop, and make the call. There's no prize for pressing on when a mistake means a flooded bathroom.
Cost of Replacing a Toilet Cistern in the UK
What you'll pay for a toilet cistern replacement in the UK depends on the type of job, the parts you choose, and whether you do it yourself or hire a plumber. A simple valve swap can cost a few pounds in parts; a full concealed system fitted by a professional can run into the hundreds. The figures below are approximate 2026 ranges to help you budget — always get itemised quotes, as prices vary by product, installer, and region (London and the South East typically run around 20% higher than the rest of the UK).
Replacement cistern (the part)
A new cistern on its own is inexpensive. Basic close-coupled cisterns start from around £50, with most mid-range dual-flush units sitting in the £50–£150 bracket. A complete close-coupled toilet (pan and cistern together) starts from roughly £100, rising with brand and style. Concealed and wall-hung cistern-and-frame systems start higher, from around £230 upward for the unit alone.
Flush plate (the part)
Flush plates span a wide range depending on brand and finish. A basic chrome or white plate can cost as little as £15–£30, while designer plates in glass, matt black, or brushed metal from brands commonly run £40–£100+. Because plates must match your frame, buy on compatibility first and finish second — a cheap plate that doesn't fit your frame is money wasted.
Internal valves (the parts)
Individual components are the cheapest fix of all. A bottom-entry fill valve costs around £15; a flush valve or drop-valve cartridge typically runs £15–£40; and a full flush mechanism or siphon sits in a similar band. Seals, washers, and gaskets are a few pounds each. For a DIYer, most single-part repairs come in under £40 all-in.
Labour (if you hire a plumber)
Plumbers in the UK typically charge £40–£60 per hour, with many applying a minimum one-hour charge to cover travel. On that basis:
Replacing a fill or flush valve: around £80–£120, roughly a 1–2 hour job.
Replacing a syphon: around £100–£150 including the part.
Fitting a new close-coupled toilet like-for-like: labour from around £150, or £300–£500 total for parts and fitting.
High-level or low-level cistern toilets: typically £300–£500 all-in, as they take longer to fit.
Bear in mind quotes often exclude removing and disposing of the old unit (add roughly £50–£100), and winter or emergency call-outs can carry a premium.
Full concealed system replacement
This is where costs climb, because the work is far more involved than a straight swap. A concealed or wall-hung unit itself commonly runs £300–£400, and because installation means fitting a frame, connecting concealed pipework, boxing-in, and usually re-tiling, labour is substantially higher — often £300–£400 on top. Building the supporting frame alone typically adds £150–£300, with tiling and finishing on top of that. Realistically, budget £600–£800+ for a full concealed system professionally supplied and fitted, and more if the wall needs opening or re-tiling.
This large gap is exactly why, for an existing concealed toilet, servicing it through the flush plate (a new valve or plate for tens of pounds) almost always beats replacing the whole system — as long as you can source the matching part.
At a glance
Job | DIY parts cost | With a plumber (parts + labour) |
Flush plate replacement | £15–£100 | ~£60–£150 |
Internal valve replacement | £15–£40 | £80–£120 |
Syphon replacement | £15–£40 | £100–£150 |
Exposed (close-coupled) cistern | £50–£150 | £300–£500 |
Full concealed / wall-hung system | £230–£400 | £600–£800+ |
Figures are approximate 2026 UK ranges and exclude VAT variations, disposal, and regional premiums. Always obtain itemised quotes before committing.
Maintenance Tips to Extend the Life of Your Cistern
A cistern that's looked after can run trouble-free for well over a decade, while a neglected one fails early — usually from limescale, perished rubber, or a small leak left to worsen. Good concealed cistern maintenance (and the same applies to exposed units) is mostly about catching problems early and keeping the internal parts clean. None of it takes long, and it saves you the cost and disruption of a premature repair. Here's what to do.
Clean the flush plate regularly
On a concealed toilet the flush plate is handled many times a day and shows fingerprints, dust, and limescale spotting. Wipe it with a soft, damp cloth and a little mild soap; for a chrome or brushed-metal plate, dry it afterwards to prevent water marks. Avoid abrasive pads and harsh chemical sprays, which scratch and dull the finish over time. Cleaning around the edges also helps you notice early if the plate is loosening or a button is starting to stick.
Check for leaks
A small leak wastes water and quietly causes damage long before it's obvious — especially with a concealed cistern, where the tank is hidden. Once every month or two, run the dye test: put a few drops of food colouring in the cistern, wait 20–30 minutes without flushing, and check the bowl. Colour in the bowl means the flush-valve seal is passing and should be renewed. Also glance around the base of an exposed toilet for damp, and watch for the wider warning signs of a hidden leak — damp or discoloured walls, a musty smell, or a water bill that's crept up for no reason.
Descale internal components in hard water areas
Limescale is the single biggest enemy of a cistern in hard-water regions, which cover much of the UK, southern Europe, and large parts of the US. Scale builds up on the fill valve, the flush-valve seal, and the small rim jets under the bowl, causing weak flushes, valves that won't seal, and noisy filling. Periodically descale with white vinegar or citric acid rather than harsh proprietary descalers: wipe down the internal parts, and for the rim jets, you can hold vinegar against them or let it sit. If you're in a very hard-water area, descaling every few months keeps everything moving freely and dramatically extends the life of the valves and seals.
Replace worn seals promptly
Rubber is the most common failure point in any cistern — it hardens and perishes with age, faster in hard water. Don't wait for a seal to fail completely: if you notice a slow leak, a valve that's beginning to pass, or perished-looking rubber when you have the cistern open, renew it straight away. Seals and washers cost only a few pounds, and replacing one early prevents both water waste and the far greater cost of water damage. Whenever you take a cistern apart for any reason, fit fresh seals as a matter of course rather than reusing old ones.
Avoid harsh chemical cleaners inside the cistern
This is the most important habit of all, and the one most people get wrong. In-cistern cleaning tablets and bleach blocks — the kind that sit in the tank or clip over the rim to colour the water — are a leading cause of premature failure. They keep aggressive chemicals in constant contact with the rubber seals, washers, and valve components, perishing them far faster than normal wear. Many manufacturers warn that using them voids the warranty. Keep the cistern chemical-free: clean the bowl with the lid down and the water untreated, and use in-bowl products only, never in-tank ones. This single change can add years to the life of your internal parts.
Inspect the fill valve periodically
The fill valve does the most work of any part — operating on every flush — so it's worth a periodic check. Every so often, lift the lid (or access through the flush plate on a concealed system) and watch a full fill cycle: the valve should fill smoothly and shut off cleanly at the marked water level, without hissing on after it should have stopped, groaning, or hammering. If the level has drifted, reset the float; if it's noisy or slow, it may be scaled up (descale it) or starting to wear (service or replace it before it fails). Catching a tired fill valve early prevents both a running cistern and the overflow that follows.
A simple maintenance routineMonthly: a quick look and listen — check the flush is clean and strong, and the cistern fills and shuts off quietly.
Every 1–2 months: run the dye test to catch a silent leak early.
Every few months (hard-water areas): descale the fill valve, flush-valve seal, and rim jets with vinegar.
Ongoing: keep all chemical tablets out of the cistern, and renew any worn seal the moment you spot it.
Stick to this and most cisterns will run reliably for 10–15 years or more — turning what could be a premature replacement into a part you barely have to think about.